
The chimney is the highest point of the house… that’s true.
And is constantly being exposed to rain, snow, and various storms hitting it from all sides.
In addition, it suffers considerable strain due to heating from the inside gases produced by burning households and cooling the outside, exposed to the weather.
So it does work hard for us under less than easy circumstances.
It is usually noticeable at first glance the effects of their situation when these elements take a toll on the chimney itself, such as erosion, falling plaster, cracks and perhaps loose bricks in the mouth to name a few…
Sometimes, the bricks are “spalling”, meaning that the face of the brick has separated from the brick itself.

The mortar itself may begin to look sandy or start to crack and crumble.
The repair of the chimney is not difficult.
The only thing you need to get over is if you suffer from heights, if so.
Either strap yourself in very well or you could get a friend to help on the tallest of chimney points.
Begin by rebuilding the mouth, with a layer of concrete 8 to 10 inches thick.
The Chimney Brick Repair Formwork:
First, you, and possibly your friend will make a casing with four tables supported on the edges of the masonry, or above the roof surface, to give you the form of a truncated pyramid.
It can stand alone and have the additional advantage that a single transaction is a structure and surface slope required.
Within the smoke tube, introduced also other molds protruding about 10 inches above the masonry.
To reinforce the concrete, it must be placed inside the formwork ring round steel rod, 6 or 8 mm in diameter.
This effort does not preclude the possibility of future cracks, but it ensures the unity of the concrete layer.
Neither would be wrong if you decided to introduce short vertical round steel nails driven into the joints of the bricks, provided they are not loose, of course…
This would give you added confidence that your work will last longer…
Remember the elements?
You don’t think that after you do this fixing up the elements are not going to come along and start playing havoc with your chimney again.

If the chimney stone or previous cement is loose, it should be removed before replacing it with cement mortar.
That is a process called tuckpointing. If it’s done correctly, tuck-pointing will prolong the life of the chimney without having to rebuild the whole thing.
The preparation of the concrete is dry mixing one part cement and four gravel, then wetting everything in moderation.
After preparing the base and placing the iron and the form, we all get wet, pour concrete, and pack well when doing your stone chimney repair.
After seven or eight hours when the material begins to set, carefully remove the casing, and re-wet the sides and the alders.
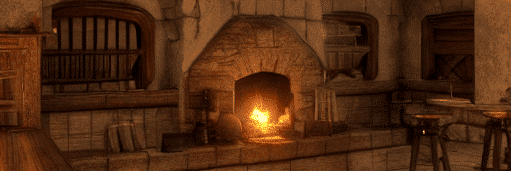
Consider now the rest of the fireplace.
If you find that the plaster is loose or broken, then renew it immediately, otherwise, you run the risk that a loose piece of roof covering damage may hurt someone.
Do not underestimate the power of the wind!
Moreover, any place that is not filled properly allows rainwater to penetrate, soak the masonry, and damage to the deposition of soot.
The Roof
Check the junction with the roof deck.
The usual zinc skirt is attached to a ribbon, zinc is also introduced in the masonry.
The joint between the masonry and brick veneer should be seen as completely airtight, otherwise, the water will enter through the crack into the house.
Now you don’t want to be sitting there with your cup of cocoa, relaxing. Only to be rudely splashed by water falling on your head, do you?

If the joint is badly done, which is very frequent, to say the least by people… repeated expansion and contraction of metal end up destroying it, and the mortar becomes loose and falls off.
In these cases, we must eliminate all traces of the old filling and fill the joint with suitable material as a paste or a bituminous fibre putty, which is soft, elastic, and retains its elasticity.
You might cringe when thinking that you have to crawl up a ladder and do some Chimney Brick Repair, but look on the bright side.
No more getting splashed on the head by water or fallen brinks on your lawn after a big storm.
So, you’re ready to roll up your sleeves and tackle that chimney brick repair yourself?
That’s fantastic!
So… a follow-up, we’ll walk you through the steps to repair your chimney bricks like a pro.
Let’s dive in and give your chimney some much-needed attention!
Step 1: Assess the Damage:
First things first, take a close look at your chimney bricks.
Are there any cracks, loose bricks, or areas that need some TLC?
Understanding the extent of the damage will help you determine the best approach for your repair project.
Step 2: Gather Your Tools and Materials:
Now, let’s gather the tools and materials you’ll need.
Grab a trusty hammer, chisel, masonry adhesive or mortar mix, a trowel, safety goggles, and work gloves.

It’s always better to have everything ready before you start your repair adventure!
Step 3: Remove Loose Bricks and Debris:
If you come across any loose or damaged bricks, be gentle as you remove them using your hammer and chisel.
We don’t want any extra damage, right? Don’t forget to clean out any debris or loose mortar from the area you’ll be working on.
Step 4: Prepare the Mortar Mix or Adhesive:
It’s time to mix up that mortar or adhesive!
Follow the instructions on the packaging to prepare the product.
Mix it thoroughly until you achieve a workable consistency. Think toothpaste-like texture!
Step 5: Apply Mortar or Adhesive:
With your trusty trowel in hand, apply a layer of mortar or adhesive to the cleaned area where the bricks were removed.

Make sure it’s smooth and even.
Then, press those bricks back in, aligning them with the existing ones and checking their level with a handy-dandy level tool.
Step 6: Smooth and Clean Up:
After placing the bricks, use your trowel to smooth out any excess mortar or adhesive.
Take a moment to admire your work! Now, clean up any spills or smudges on the bricks with a damp cloth. It’s all about those finishing touches!
Step 7: Finishing Touches:
Once the repaired area is dry, you might consider applying a waterproof sealant or paint to protect the bricks from moisture.
This extra step can help extend the life of your repair and keep your chimney looking sharp for years to come.
Well done, DIY champ! You’ve successfully tackled your chimney brick repair project with a friendly spirit and can-do attitude.
Remember, safety always comes first, so wear those goggles and gloves, and take your time with each step.

If you ever feel unsure or encounter major damage, don’t hesitate to reach out to a professional for assistance.
Now, sit back, relax, and enjoy the cozy warmth of your fireplace, knowing you’ve given your chimney the love it deserves. Great job, and happy DIY-ing!