
Why is it so hard to light a fire…
It has been said, ‘Why does it need a whole box of matches to light my fireplace, but only a single spark to set a forest fire’.
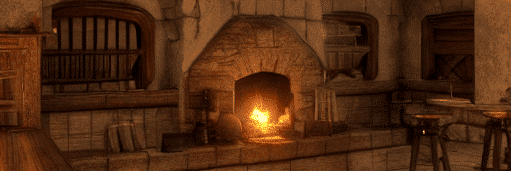
True, but not always so easy to even get a fireplace burning in the Forrest though.
It’s no different when it comes to wood burning fire pits…
Fire lighting is a dying art, and I am not talking about trying to do a Bear Grylls and light a soaking wet log in a hurricane.
Today, of course, domestic heating and hot water systems are automated, and people’s job years ago has now become redundant, hence fire lighting has become a dying art.
However, the skills exhibited by Mr. Grylls in an extreme environment are exactly the same for all fires, indoors or out, and should be used to light your wood-burning fire pit.
Once mastered they will become second nature to you, and using the right ‘materials’ and method upfront will make the job simple.
The Concept Of Fire Building
The rules of fire building are simple, start small and build up.
Patience will get your fire pit alight quicker than trying to rush it.
However, once you have practiced a few times and understand the ‘science’ of fire building, there is a bit of a shortcut which I will explain at the end of this article.
Building A Fire
To start a fire, you need small and dry flammable material.
This can be small wood twigs, dry grass, pages of dry newspaper, etc.
In fact, anything that will flare up quickly.
However, what flares up quickly and easily, also dies down very quickly, so we then need a secondary source of fuel, that will catch alight from the first source and begin to burn for a longer duration, these can be slightly more substantial bits of twigs or kindling.

At this point where most people go wrong, they try to rush it and end up extinguishing the fire by using too large pieces of wood/twigs, in each successive stage of building the fire.
Patience is the key here.
The best way to put a fire out is to starve it of oxygen.
It, therefore, stands to reason that the best way to start a fire is to use oxygen!
We do that by allowing the air to flow through fire at all times.
So do not pack everything down, leave it loose, and allow the air to flow through it.
Build up the wood/twigs in a teepee shape to let the air circulate.
Remember a fire flows upwards, try to use the flames when starting a fire to light the next stage, don’t put it all at the base, help the fire build upwards and allow air to flow through it.
Of course, you can use modern materials to help with this, such as firelighters, but the principle of building the fire up in layers still applies.
A whole box of firelighters will not get the fire going if the wood/twigs you are using are too big.
They will just burn out before the fire catches.
A word of warning, do not throw petrol or any other flammable liquids onto a fire to get it going, it is highly dangerous!
No petrol OK!
Might be quick, but quicker is not always better.

And in this case not advisable.
In simple terms that is it, start small, and build up layers of the fire in the same manner until you can put decent-sized logs onto your fire pit without extinguishing the fire.
Short Cut to Lighting Your Wood Burning Fire Pit
I mentioned a shortcut earlier, so here it is.
Once you have developed a feel for how the fire burns up into each stage and larger bits of wood, you can build a staged fire in one go.
Instead of building layer by layer as the fire grows, you build up the first few layers before lighting the fire.
Once lit you can watch the fire grow and build until it is ready for some bigger logs.
And when I mean bigger logs, I don’t want to see you dragging a big log from who knows where getting ready to cut it with a big axe.
This is going too far at this stage……
Start by building the starter level of fire in the teepee or pyramid shape.
Then build the next level of fire over the teepee shape following the lines of the material below it, so that the flames will burn up into the next level and so on.
Remember to let the air flow through.
You can then add another layer.

The more experienced you become, the more layers you can build before lighting the fire.
Effectively you are building layers of teepees over each other.
Then light the first layer, and watch the fire grow.
I would advise against building the complete fire, leaving the biggest wood off until the fire is going really well.
Fire building is easy if you’re not doing it in extreme conditions, and you have dry materials to start with, it just needs a little patience and practice.
Once you have got the feel for it, you will remember how to build up a wood burning fire pit like an expert, go on puff out your chest and march around knowing that you have re-learned an art that not everybody knows.
Do not keep doing this to keep the fire going OK!
How to Light Your Wood-Burning Fire Pit: A Friendly Guide
So, we’ll walk you through the steps to light your wood-burning fire pit like a pro in another way OK…
So grab your marshmallows and let’s get started!

Step 1: Gather Your Supplies:
First things first, make sure you have everything you need.
Grab some dry firewood, kindling (small sticks or twigs), newspaper, and matches or a lighter.
Oh, and don’t forget some fire starters if you have them handy!
Step 2: Prepare the Fire Pit:
Clear away any debris or flammable materials around your fire pit.
Safety first, right?
Open the vents or adjust the airflow to ensure proper ventilation. This helps your fire burn efficiently and reduces smoke.

Step 3: Create a Base:
Now it’s time to create a base for your fire. Start by crumpling a few sheets of newspaper and placing them at the bottom of your fire pit.
This will help ignite the kindling and get your fire going.
Step 4: Arrange the Firewood:
Next, carefully stack your firewood on top of the kindling.
Start with smaller pieces at the bottom and gradually work your way up to larger logs. Leave enough space between the logs to allow air to circulate.
Step 5: Ignite the Fire:
Here comes the fun part! Light the newspaper with a match or lighter, focusing on multiple spots to ensure a good start.
Watch as the flames slowly catch onto the kindling and begin to spread to the firewood. Feel that warmth building up!

Step 6: Add Fuel and Maintain:
As your fire grows, you can add more firewood to keep it going.
Remember to always add wood gradually to avoid smothering the flames. Sit back, relax, and enjoy the crackling sound and mesmerizing dance of the fire.
Step 7: Extinguish Safely:
When it’s time to call it a night, make sure to extinguish the fire safely. Use water or sand to douse the flames completely.
Remember, never leave a fire unattended, and ensure it is fully extinguished before leaving the area.
Now you’re equipped with the knowledge to light your wood-burning fire pit like a pro!

Just follow these friendly steps, and you’ll be enjoying the cozy ambiance and toasty warmth of your fire pit in no time.
So gather your friends, grab some s’mores, and let the fireside fun begin!