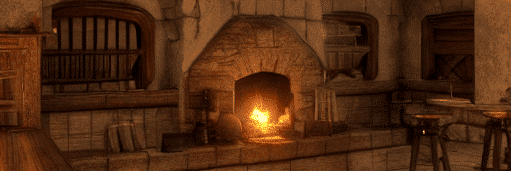
Brick Veneers have always been a good choice when you want to give something a facelift.
So why not use them for a fireplace makeover?
Let’s find out what it’s all about shall we?
s all about shall we.
Brick Veneers for your Fireplace
Choosing your Stone:
You need to be aware that stone veneer is available in several different shapes and colours.
The manufactured stone veneer that you select will be determined by the design style that you are attempting to achieve… of course, you will have your own taste and ideas.
The stone veneer you select will have a huge impact on the overall appearance and feel of your project, regardless of whether you’re going for an old-fashioned farmhouse design or possibly a contemporary streamlined look.

The web makes looking for home design styles easier than ever before.
You can discover plenty of design and home improvement websites on the internet that can help you select the style of stone that will work best for your project.
Invest some time and pick your stone carefully, because it is difficult to change after the project is completed and everything is installed.
Yep… need to get this right.
I don’t want to have visions of you with the sledgehammer breaking down all that stone of that outdated fireplace you so lovingly put up…
No…
I’m getting that vision out of my head and blocking my ears to the language as well.
It’s advised that you request a sample or samples of the manufactured stone that you have selected, this will enable you to see the true colour variations and match them up together with the existing style in your house.
Things to Consider:
It is highly recommended for your outdated fireplace, that you mount your new mantel before the installation of your new manufactured stone (A new mantel is optional, the majority of people utilize their existing mantels).
Installation of a new mantel after the fact is often tricky due to the cutting and trimming of the stone that will need to be done on the wall of your outdated fireplace.
Due to the unevenness of stone products, It’s also not recommended to install your new mantel to the face of the manufactured stone.

Suggested Materials and Tools:
– 5-gallon bucket
– Polymer-modified masonry veneer mortar
– Power drill with a mortar mixing paddle
– 2.5 or 3.4 pounds expanded metal lath
– Modified truss head lath screws
– Grade D felt paper (60min)
– Plywood
– 4″ handheld disc-grinder with a diamond blade
Before You Begin:
1. Most of the debris and dust should be removed from the area you’re adding your stone to before laying your stone veneer.
The bond between the stone veneer and the installation surface may be inhibited by any existing dust and dirt.
Build Out Your Wall (Optional):
2. If you’d like to increase your stone veneer installation to the ceiling, you have the option of building out the wall membrane above your current fireplace.
Assemble a wood structure to your desired dimension and firmly anchor it to your wall. (please note: installing the scratch coat and stone will add increased dimension and should be considered while constructing your fireplace).
Sheathing Installation (If Carrying out Step 2):
3. A layer of sheathing should now be placed over the wood frame. You can purchase many types of sheathing that may be used including particleboard or cement board.
The most traditionally used sheathing for this kind of application is plywood.
Apply Weather Resistant Layer and Lath:
4. Mount the WRB in compliance with the manufacturer’s installation recommendations. Now, install a layer of 2.5 or 3.4 pounds of expanded metal lath horizontally. The lath needs to overlap a minimum of 2 on the horizontal and vertical seams.

Install Scratch Coat:
5. Install a nominal 3/8″ thick covering of mortar over the lath with a mason’s trowel. Be certain the lath is absolutely covered with mortar to allow for the scoring of the surface. The mortar needs to be applied with ample pressure and thickness to fully embed the lath.
The moment the mortar is thumbprint hard, scratch the surface horizontally with a notched trowel, scarifier, or scrap piece of lath to create a scratch coat.
Installation of Manufactured Stone Veneer:
6. Right after the scratch coat cures (allow at least 24 hours) and before the stone is installed, snap 8″ chalk lines across the wall for the purpose of proper horizontal placement of stone (this step does not apply if applying irregularly shaped stones).
Apply One or two cornerstones at the bottom corner of your wall surface. Add mortar to the back of your stone and work it into the wall with a sideways motion to create a bond.
There is a short and long return for all cornerstones. The returns should alternate in opposite ways on the wall’s corner staying within the chalk lines.
Continue on with the application by installing flat stones off of these corner pieces. Every additional course that’s installed will begin with a cornerstone.
Stone Veneer is easily shaped and cut as desired. This will allow you to fit stones easily into place, ensuring a natural-looking wall with tight mortar joints.
Trimming or forming can be done by using either of the following tools: a 4″ hand-held disc grinder with a diamond blade, nippers, or a wet saw. Don’t forget to always wear safety eyeglasses when cutting manufactured stone.
Enjoy your exquisite new stone fireplace!
Confer with local building experts for building code requirements. They vary from area to area.

While you are dreaming of your fireplace being built…
Why not see it on tv?
