Welcome to “Transforming Candle Holders: Quick Tip Wednesday,” a video series by Decorating with Barbara.
In this episode, Barbara shares a quick decorating tip about candle holders, along with a small haul of thrifted goodies. She begins by showcasing a Nicole Miller pot and suede pillow, adorned with beautiful embroidered flowers, which she snagged for just $2.99.
Barbara then unveils her most exciting find: a Pottery Barn candle, identical to one she had purchased for a higher price elsewhere. She highlights the subtle differences in flicker and expresses her delight in stumbling upon this gem at Goodwill for only $3.99.
As she continues her haul, Barbara presents a charming metal container that perfectly fits her fall decor aesthetic, an exquisite carved pair of candlesticks designed for taper candles, and her ingenious solution to transform them into pillar candle holders using recycled candle lids and a little spray paint.
Don’t miss out on this engaging episode packed with budget-friendly decorating tips and creative hacks!
Candle Holder Haul
If you’re looking to add some unique and creative pieces to your home decor, candle holders are a great place to start. They can be transformed into one-of-a-kind pieces that showcase your personal style and creativity.
In this article, we will explore a candle holder haul that includes a Nicole Miller pot and suede pillow, a Pottery Barn candle find, a metal container for fall decor, and a pair of carved candlesticks.
These items have the potential to be transformed into stunning and eye-catching pieces with just a few simple techniques. So let’s dive into the world of candle holder transformation!
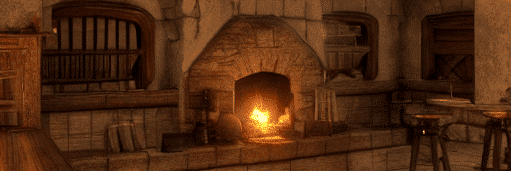
Transforming Candle Holders
Candle holders come in all shapes and sizes, and sometimes the ones we find may not fit our specific needs or decor style.
However, with a little bit of creativity and some DIY techniques, we can easily transform these candle holders into something truly unique and beautiful. In this section, we will explore various ways to transform candle holders, including using a lid as a platform, spray-painting the candlesticks, and gluing the tops onto the candlesticks.
These techniques will allow you to personalize your candle holders and create pieces that truly reflect your style and taste.
Using a lid as a platform
Have you ever come across a pair of candlesticks that you absolutely love, but they don’t fit your desired candle size? Don’t worry – there’s a simple and creative solution!
By using a lid from a candle container, you can create a platform for your candlesticks that will accommodate larger candles. Start by finding a lid that matches the diameter of your candlesticks. Clean it thoroughly and make sure it’s dry.
Apply some e6000 glue around the rim of the lid, then carefully place the candlestick on top of it. Press down gently to ensure a secure bond.
Once the glue is dry, you can confidently place your larger pillar candles on top of the platform, creating a stunning centerpiece or decor item.
Spray-painting the candlesticks
If you have candlesticks that don’t quite match your desired color scheme, don’t fret – a quick spray paint makeover can do wonders!
To transform your candlesticks, start by finding a well-ventilated area to work in, such as outside or in a garage. Lay down some newspaper or a drop cloth to protect the surface you’re working on.
Place the candlesticks on the protective surface and shake the spray paint can vigorously. Begin spraying the paint evenly and lightly over the candlesticks, moving the can in a sweeping motion.
Allow the paint to dry completely before flipping the candlesticks over and repeating the process on the other side. Once the paint is dry, you’ll have candlesticks that perfectly match your decor and style.
Gluing the tops onto the candlesticks
One of the challenges we often face with candle holders is finding the right size and shape to fit our candles securely.
If you have candlesticks that are meant for taper candles but want to use them for pillar candles, fear not – a little bit of glue can solve the problem. Start by finding a decorative top that matches the style of your candlesticks and the size of your pillar candles.
Clean the top and the candlesticks thoroughly, ensuring they are dry. Apply some e6000 glue to the top of the candlestick, then carefully place the decorative top on top of it.
Press down gently to create a strong bond. Allow the glue to dry completely before placing your pillar candle on top. Voila! You now have a unique and personalized pillar candle holder.
Step-by-Step Guide
Now that we have discussed the different techniques for transforming candle holders, let’s dive into a step-by-step guide to help you through the process.
Whether you’re a seasoned DIY enthusiast or a beginner, this guide will provide you with clear and concise instructions on how to create stunning candle holders that reflect your personal style.
Step 1: Gather materials
Before you begin the transformation process, make sure you have all the necessary materials handy.
This may include the candle holders you wish to transform, a lid for platform creation, spray paint in your desired color, e6000 glue for securing tops, and any other decorative elements or tools you may need.
Step 2: Prepare the candle holders
If your candle holders are dirty or have any residue on them, clean them thoroughly using soap and water. Allow them to dry completely before moving on to the next steps. If you are using a lid for a platform, ensure it is clean and dry as well.
Step 3: Spray-paint the candle holders
Take your candle holders to a well-ventilated area, such as outside or in a garage. Lay down newspaper or a drop cloth to protect the surface you’re working on.
Shake the spray paint can vigorously, then begin spraying the paint evenly and lightly over the candle holders. Move the can in a sweeping motion to ensure even coverage.
Allow the paint to dry completely before flipping the candle holders over and repeating the process on the other side.
Step 4: Apply glue to the tops of the candle holders
If you are using decorative tops to transform your candle holders into pillar candle holders, it’s time to apply the glue.
Take your cleaned and dry candle holders and apply a small amount of e6000 glue to the top. Be careful not to use too much glue, as it may spill over and create a messy appearance.
Once the glue is applied, carefully place the decorative tops on top of the candle holders. Press down gently to create a secure bond.
Step 5: Attach the tops to the candle holders
After placing the decorative tops on the candle holders, make sure they are aligned properly. You can adjust them slightly if needed before the glue begins to dry.
Once you are satisfied with the positioning, press down firmly to ensure a strong bond. Allow the glue to dry completely before placing your pillar candles on top of the candle holders.
![]()
Tips and Tricks
Now that you have learned the step-by-step process of transforming candle holders, here are some additional tips and tricks to enhance your DIY experience and ensure the best possible results:
Look for unique candle holders at secondhand stores
When searching for candle holders to transform, consider visiting secondhand stores or thrift shops. These places often have a wide variety of candle holders at affordable prices.
You may come across unique and unusual pieces that you won’t find anywhere else. So, keep an eye out during your thrift store trips and let your creativity run wild!
Consider spray-painting candle holders for a new look
Spray painting candle holders is an easy and effective way to give them a whole new look.
If you have candle holders that don’t quite match your desired color scheme or decor style, consider giving them a fresh coat of paint. You can choose a color that complements your existing decor or opt for something bold and vibrant to make a statement.
The possibilities are endless, so don’t be afraid to get creative with your color choices.
Reuse lids as platforms for candle holders
If you have candle holders that don’t fit your desired candle size, repurposing lids from old candles can be a great solution. These lids provide a stable platform for larger candles and can be easily attached to your existing candle holders using e6000 glue.
Not only does this technique save you money on purchasing new candle holders, but it also allows you to personalize your decor and make use of items you already have on hand.
Use e6000 glue for a strong bond
When gluing tops onto candle holders or attaching any other elements, it’s important to choose a strong adhesive that will create a secure bond. E6000 glue is a popular choice among DIY enthusiasts for its strength and durability.
When using e6000 glue, make sure to follow the instructions on the packaging and allow the glue to dry fully before handling the candle holders. This will ensure that the bond is strong and long-lasting.
Candle holders are a versatile and customizable home decor item that can add an extra touch of elegance and beauty to any space.
With just a few simple techniques, you can transform ordinary candle holders into unique and eye-catching pieces that reflect your personal style.
Whether you choose to use a lid as a platform, spray-paint the candleholders, or attach decorative tops, the possibilities for creativity are endless.
By following the step-by-step guide and implementing the tips and tricks provided, you’ll be well on your way to creating stunning candle holders that will enhance your home decor and showcase your DIY skills.
So go ahead, embrace your inner creativity, and begin your journey of candle holder transformation today!