
Yes…
There really is such a thing, a fireplace paint.
Do you think that when you have an inspiration of your fireplace is looking a little worn that you use normal paint to do the job?
Think again!
The Difference with Fireplace Paint
There really is an affordable and easy way to make that wood stove or fireplace of yours look brand-new, you know…
Paint it!
That’s right…
Paint it!

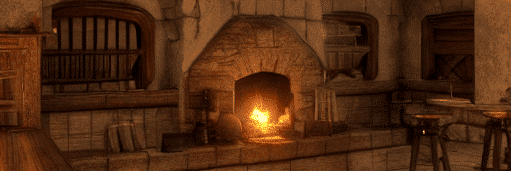
Over time, fireplaces can start looking a little dull, and the finish can rust or chip.
If you have a more modern-looking fireplace you want it to look new
Now you decide, OK…
You want to paint your fireplace.
But hold on!
You can not just go out and buy any old paint on the market…
No!
It has to be a special sort of paint, as fireplaces get hot and not all paints are designed to cope with extreme heat.
There is, in fact, a special high-temperature paint on the market for just this sort of situation, and it is a great way to make your fireplace look young again.
While I may add…
By also adding a layer of protection against wear and rust.

Let’s look at how you would prepare your stove or fireplace for paint, shall we…
Fireplace paint is paint that can withstand high temperatures, ranging from 600 to a hefty 2,000 degrees.
Now, that’s getting hot.
You will also find many colour options, so you should be able to find the colour scheme you want.
And you can use it to paint:
- inserts
- surrounds
- boilers
- other chimney pieces
- vent pipes wood stoves
- screens
But you can not go using it on:
- stove burner grates
- kitchen stoves
- steam radiators
And no direct contact with food.
There are two main types of fireplace paint:
- brush on paint
- aerosol paint
How to Apply the Stove Paint
Firstly, you need to prep the surface you are going to work on.
Decide if you need to remove the existing paint or if you can just paint over it.

If the old paint is badly chipped or even rusted away, then it is better to just remove it.
In order to remove old paint, you need to use a drill with a steel wool attachment, this actually speeds up the sandblaster or an orbital sander.
If the paint is discoloured but not damaged and also does not chemically react with the new paint, there really is no need to remove it.
You can also touch-up isolated paint chips or even small scuffs that are not that deep without removing the adjacent paint.
Instead, just scuff the surface with some sandpaper or even steel wool if you have any…
As you want to make a rougher surface so that the new paint will adhere to it easily.
Now, wipe off all the paint dust and don’t forget the tape off the glass and any other parts you don’t want to paint.

Now, you are ready to do your painting from start to finish.
Also, there is some paint that might require a primer spray paint.
Look into that.
Shake the can vigorously to stir the paint in the spray can evenly, and keep the can at least 12 inches away from the surface while you are spraying.
Start near the top and work your way downwards, as the spray, with gravity, will float downwards on your project.

Work it in short, controlled bursts to avoid any of those drips and runs.
Make sure that you follow the directions for how long to wait between coats, and always use several light coats.
This will allow the paint to stick better and gives the best finish.
Using Paint in a Can
When you first open the can’s lid, wait for a couple of minutes to mix the paint.
Take a look at the colour of the paint in the can, if you see areas where the paint is lighter or darker.
You will need to use a stir stick to mix the paint until the colour evens out.
Paint Do’s and Don’ts to Remember
When you are painting…
Make sure that you are painting in a well-ventilated area, and do make sure to follow all the manufacturer’s instructions.
Wait for the recommended length of time between coats, and it is a good idea to wear a pair of gloves.
Do not go and apply the layers too thickly, and don’t hold the nozzle in one place for too long.
It’s Time to Cure the Fireplace Paint
With this paint’s heat-resistant properties, you need to make sure that the surrounding area is well-ventilated before you begin curing.

Wear a face mask and make sure that everyone else leaves the area during the process.
Fire up the appliance, being your fireplace or your wood stove, to approximately 100 to 250 degrees for 15 to 20 minutes.
Now gradually increase the temperature of the fire to around 500 degrees over the course of 45 minutes to an hour.
Expect to smell an odour from the paint as it dries, and you will also see some light smoke.
Do not be alarmed by this, it is the natural curing process.
As the paint sets, your work is finished.
And…
You have successfully applied and cured the fireplace paint by yourself.