
Imagine the scene: Workshop Wednesdays presents an intriguing project called the “Rustic Tealight Log Holder”.
In this video, they demonstrate the step-by-step process of transforming a log into a unique centerpiece for your home decor. First, the log is cut in half to create two sections, each with a flat bottom.
Then, precise measurements are made to determine the placement of the tealight holes. With the help of high-quality Forstner Bits, the holes are drilled out, ensuring a snug fit for the candles.
After drilling, the log is coated with polyurethane to preserve the bark and provide durability.
Multiple coats may be necessary to achieve the desired finish. The final product boasts a charming rustic look, with the candles fitting snugly in their designated spots.

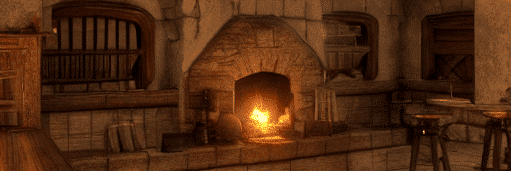
This image is property of i.ytimg.com.
Log Preparation
Cutting the log in half
To create a unique and rustic tealight holder, the first step is to take a log and cut it in half. This will give you two different sections to work with. Additionally, it’s important to ensure that each section has a flat bottom, so they can sit securely when the tealights are placed inside.
Creating a flat bottom
Once the log is cut in half, the next task is to create a flat bottom for each section. This can be achieved by flipping them over and planning out where the drill holes will be placed.
Careful consideration should be given to the size and shape of each section, as well as how many holes will be drilled.
Planning the Drill Holes
Determining the placement of the drill holes
Before drilling the holes, it’s essential to plan out their placement. This involves considering the size and shape of each section, as well as the desired aesthetic.
For example, if one section is smaller, it may be ideal to place three holes closer together to create a visually appealing arrangement.
Planning for closer holes on a smaller section
When one section of the log is smaller than the other, it’s important to plan for closer holes. This will help create a balanced and visually pleasing design.
By spacing the holes closer together on the smaller section, you can achieve an arrangement that highlights the unique characteristics of the log.
Drilling the Holes
Using a Harbor Freight kit with Forstner Bits
For drilling the holes in the log, it is recommended to use a Harbor Freight kit that includes Forstner Bits.
These bits are known for their sharpness and effectiveness. By using quality tools, you can ensure clean and precise holes that will enhance the overall appearance of the tealight holder.
Clamping down the log
Before drilling, it’s crucial to secure the log in place. This can be done by clamping it down. By ensuring the log remains stable during the drilling process, you can avoid accidents and maintain accuracy in hole placement.
Drilling the holes
With the log securely clamped down, it’s time to start drilling the holes. Using the Forstner Bits from the Harbor Freight kit, carefully and slowly drill each hole.
Take your time to ensure that each hole is straight and consistent in depth. As you drill each hole, you will start to see the unique character of the log come to life.
Coating with Polyurethane
Reason for coating with polyurethane
To preserve the natural beauty of the log and prevent the bark from flaking off, it is recommended to coat the tealight holder with polyurethane. The polyurethane acts as a protective layer, keeping the bark intact and ensuring the holder’s longevity.
Number of coats required
To achieve the desired level of protection, it is generally recommended to apply two to three coats of polyurethane. However, depending on the thickness of the coating and personal preference, you may choose to apply up to four coats.
The additional coats will provide added durability and enhance the overall appearance of the tealight holder.
Waiting time between coats
After applying each coat of polyurethane, it’s important to allow sufficient drying time before applying the next coat.
This drying time will vary depending on the specific product used, so it’s essential to read the instructions provided by the manufacturer. By giving the coats of polyurethane ample time to dry, you can ensure a smooth and even finish.

Final Product
The rustic appearance of the finished holder
After all the drilling and coating, the final product is a unique and rustic tealight holder.
The natural beauty of the log is enhanced by the drill holes, creating an eye-catching and artistic design. The rough edges and textures add to the charm, giving the holder a truly one-of-a-kind appearance.
Perfect fit for tealight candles
Designed specifically for tealight candles, the finished holder is the perfect size and shape to accommodate these small, flickering sources of light.
When the candles are placed inside the holes, they create a warm and inviting ambiance that is both soothing and captivating. The combination of the tealight candles and the holder’s rustic design is sure to impress anyone who sees it.
Inviting feedback from viewers
As a proud creator of the tealight log holder, it’s important to invite feedback from viewers.
Whether they appreciate the rustic appearance, the placement of the drill holes, or any other aspect of the design, their opinions and suggestions can help inspire future projects.
By engaging with viewers and embracing their feedback, you can continue to hone your craft and create even more unique and captivating creations.
Creating a tealight log holder is a creative and satisfying project that allows you to transform a simple log into a stunning piece of functional art.
By following the steps outlined in this article, you can successfully cut the log in half, create a flat bottom, plan and drill the holes, coat it with polyurethane, and ultimately achieve a beautiful and rustic final product.
Whether you choose to keep the tealight log holder for yourself or give it as a thoughtful gift, it is sure to be cherished for its unique charm and ability to create a warm and inviting atmosphere.
So, gather your materials, unleash your creativity, and embark on the exciting journey of crafting your very own tealight log holder.