
Imagine yourself in a cozy cabin nestled deep within the enchanting woods, surrounded by the crackling fire’s warm embrace. The flickering candlelight dances upon the walls, casting whimsical shadows that tell stories of old. How can you recreate this magical ambiance in your own home? Look no further than DIY Log Candle Holders: A Step-by-Step Guide. In this captivating article, you will embark on an artistic journey to transform ordinary logs into extraordinary candle holders, bringing a touch of rustic charm and natural beauty to your space. With the expert guidance of renowned craftsman Travis Martin, you will discover the secrets behind this enchanting craft and learn how to infuse your personal style into every piece.
Get ready to unleash your inner artist as you dive headfirst into the world of log candle holders. Travis Martin, the creative genius behind this remarkable craft, has captured the essence of nature’s elegance and combined it with his expertise to create stunning pieces of functional art. In this video series, Travis takes you through each step of the process, from selecting the perfect log to the final finishing touches. Through his detailed instructions and insightful tips, you will learn how to unleash your own creativity and create unique candle holders that reflect your personal style. So grab your tools and let your imagination run wild as you embark on this enthralling and rewarding journey of DIY log candle holders.

Materials Needed
To create your own log candle holders, you will need the following materials:
Logs
The main component of your candle holders will be logs. You can choose logs of any size and shape, depending on your preference. Look for logs that are sturdy and have an interesting grain pattern for added visual appeal.
Saw
A saw will be necessary for cutting the logs to the desired length. Make sure you have a saw that is suitable for cutting through wood.
Drill
You will need a drill to create the holes for the candle slots. A cordless drill is recommended for ease of use.
Forstner Bit
A Forstner bit is the ideal tool for drilling the perfectly sized holes for your candle slots. Make sure to choose a Forstner bit that matches the diameter of your candles.
Sandpaper
Sandpaper will be used to smooth down the rough edges of the logs and create a polished finish. Choose sandpaper with a variety of grits to achieve the desired smoothness.
Wood Glue
Wood glue is necessary for securing the pieces of log together. Look for a strong wood glue that dries clear.
Clamps
Clamps will hold the logs in place while the wood glue dries. Make sure you have enough clamps to securely hold the logs together.
Wood Stain
If you want to add color to your log candle holders, you will need wood stain. Choose a stain that complements the natural color and grain of the wood.
Clear Varnish
Clear varnish will protect the wood and give it a glossy finish. Make sure to choose a varnish that is suitable for wood surfaces.
Paintbrush
A paintbrush will be used to apply the wood stain and varnish. Choose a brush that is suitable for the size of your project.
Preparing the Logs
Before you can start assembling your log candle holders, you will need to prepare the logs. This involves selecting the right logs, cutting them to size, and sanding them to create a smooth surface.
Selecting the Logs
When selecting logs for your candle holders, look for ones that are sturdy and free from rot or damage. Choose logs with an interesting grain pattern to add visual interest to your finished candle holders.
Cutting the Logs
Using a saw, cut the logs to the desired length for your candle holders. Take into consideration the size of your candles and how many candles you want to fit in each log.
Sanding the Logs
Using sandpaper, smooth down the rough edges of the logs and create a polished finish. Start with a coarse-grit sandpaper and gradually work your way to a finer grit for a smooth surface. Make sure to sand all sides of the logs, including the ends.

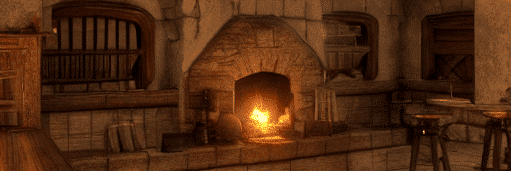
This image is property of i.ytimg.com.

Creating the Candle Slots
The next step in creating your log candle holders is to create the candle slots. This involves determining the size of the slots, measuring and marking the logs, drilling the holes, and finishing the slots.
Determining the Slot Size
Measure the diameter of your candles and choose a Forstner bit that matches the size. Depending on the size of your candles, you may want to create multiple slots in each log to accommodate more candles.
Measuring and Marking
Using a ruler or measuring tape, measure and mark the desired locations for the candle slots on the logs. Make sure to evenly space the slots and keep them centered on the logs.
Drilling the Holes
Using a drill with the appropriate Forstner bit, carefully drill the holes for the candle slots. Take your time and apply gentle pressure to ensure clean and precise holes. It is recommended to drill halfway through the log and then flip it over to complete the hole from the other side.
Finishing the Slots
Once the holes are drilled, use sandpaper to smooth the inside edges of the slots. Make sure there are no rough edges or splinters that could damage the candles.
Assembling the Candle Holders
After you have prepared the logs and created the candle slots, it’s time to assemble the candle holders. This involves applying wood glue, clamping the logs together, allowing the glue to dry, removing the clamps, and sanding the edges.
Applying Wood Glue
Apply a generous amount of wood glue to the ends of the logs that will be joined together. Make sure to spread the glue evenly and cover the entire surface.
Clamping the Logs
Carefully fit the logs together, aligning the candle slots. Use clamps to hold the logs tightly in place while the glue dries. Make sure the logs are properly aligned and level.
Allowing the Glue to Dry
Follow the instructions on the wood glue for the recommended drying time. It is important to leave the logs clamped until the glue has completely dried to ensure a secure bond.
Removing Clamps
Once the glue has dried, carefully remove the clamps from the logs. Inspect the joints to ensure they are secure and properly glued.
Sanding the Edges
Using sandpaper, sand the edges of the candle holders to create a smooth and seamless look. Pay close attention to the joints to make sure they are flush and free from any unevenness.

Staining and Varnishing
To enhance the natural beauty of the wood and protect it from wear and tear, staining and varnishing your log candle holders is recommended. This step involves choosing a suitable stain, applying the stain, allowing it to dry, applying clear varnish, and adding final touches.
Choosing a Stain
Select a wood stain that complements the natural color and grain of the logs. Consider the desired shade and finish before choosing a stain color.
Applying the Stain
Using a paintbrush, apply the wood stain to the surfaces of the logs. Make sure to cover all sides, including the ends. Allow the stain to penetrate the wood for the recommended amount of time before wiping off any excess stain with a clean cloth.
Drying Time
Follow the instructions on the stain for the recommended drying time. It is important to allow the stain to fully dry before applying varnish to prevent smudging or unevenness.
Applying Clear Varnish
Once the stain is dry, use a clean paintbrush to apply a coat of clear varnish to the logs. Make sure to cover all surfaces, including the ends. Allow the varnish to dry according to the manufacturer’s instructions.
Final Touches
Inspect the candle holders for any areas that may need additional stain or varnish. Touch up any uneven spots with a small paintbrush. Once the varnish is dry, buff the candle holders with a soft cloth to bring out the shine.
Decorating Options
Once you have finished creating and finishing your log candle holders, it’s time to add your own personal touch. There are various ways to decorate your candle holders to match your style and preferences.
Adding Natural Elements
Enhance the rustic look of your log candle holders by adding natural elements such as pinecones, dried leaves, or small branches. Arrange these elements around the candle slots or glue them directly onto the logs for a nature-inspired look.
Painting or Stenciling
If you prefer a more colorful and vibrant look, consider painting or stenciling your log candle holders. You can paint the logs with patterns or designs that match your decor or opt for a more artistic approach with stencils.
Using Ribbons or Twine
Add a touch of elegance to your log candle holders by wrapping ribbons or twine around them. Choose colors and textures that complement your decor and tie them in a bow or a knot for a stylish finishing touch.

Safety Precautions
When working with tools and materials, it is important to prioritize safety. Follow these safety precautions to ensure a safe and enjoyable crafting experience.
Wearing Protective Gear
Always wear protective gear such as safety glasses and gloves when working with power tools and chemicals. This will protect your eyes and hands from potential injuries.
Working in a Well-Ventilated Area
When applying wood stain, varnish, or any other chemicals, make sure to work in a well-ventilated area. Open windows or use fans to ensure proper air circulation and avoid inhaling harmful fumes.
Using Caution with Power Tools
When using power tools such as drills and saws, exercise caution and follow the manufacturer’s instructions. Keep your fingers and hands away from moving parts and wear appropriate safety gear.
Tips and Tricks
Creating log candle holders can be a fun and creative project. Here are some tips and tricks to help you get the best results:
Choosing the Right Logs
Look for logs with interesting grain patterns and colors to add visual appeal to your candle holders. Consider the size and shape of the logs to ensure they are suitable for your desired design.
Experimenting with Different Designs
Don’t be afraid to experiment with different designs and arrangements. Try creating candle holders with varying heights, angles, or patterns to add visual interest to your decor.
Personalizing the Candle Holders
Make your log candle holders unique by adding personalized touches. Consider engraving names or special dates onto the logs or decorating them with symbols or initials that are meaningful to you.
Maintenance and Care
To keep your log candle holders looking their best, it is important to provide proper maintenance and care.
Cleaning the Candle Holders
Regularly clean your candle holders to remove any wax residue or dust. Use a soft cloth or a brush to gently wipe off any dirt or debris. Avoid using harsh chemicals or abrasive materials that may damage the wood.
Reapplying Varnish
Over time, the varnish on your log candle holders may wear off. To maintain the protective coating and the glossy finish, consider reapplying clear varnish periodically. Follow the manufacturer’s instructions for proper application.
Conclusion
Creating your own log candle holders is a rewarding and creative project that allows you to incorporate nature into your home decor. By following the steps outlined in this article and using the recommended materials, you can craft unique and visually appealing candle holders that will add warmth and charm to any space. Remember to prioritize safety when working with tools and chemicals, and don’t be afraid to let your creativity shine through by personalizing your candle holders. With proper maintenance and care, your log candle holders will continue to delight and inspire for years to come. So roll up your sleeves, gather your materials, and start crafting your very own log candle holders today!
