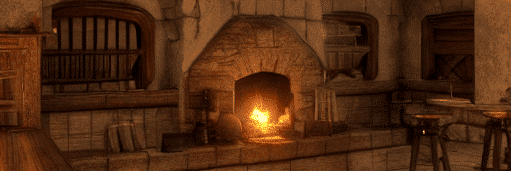
Get ready to transform your fireplace into a cozy haven with this simple and creative DIY project. Most fireplaces are only used during the colder months, leaving them as empty, dark spaces for the rest of the year.
But fear not, as we have the solution to turn your fireplace into a stunning focal point all year round. Using decorative grills and electric candles, you’ll create beautiful hurricane lamps that will fill your fireplace with a warm and inviting ambiance. The flickering flames will dance off the metal, creating a mesmerizing effect. So grab a cup of hot cocoa, sit in front of your fireplace, and enjoy the illusion of a real fire.
To make these DIY hurricane lamps, you’ll need basic materials that can be found at any local hardware store. With just a few simple steps, you’ll have elegant and charming hurricane lamps to complete the look of your fireplace.
The process involves cutting the decorative grill to the desired size, rolling the electric candle in the grill, securing it with copper wire, and stitching the two pieces together. Voila! Your stunning hurricane lamp is complete.
Why stop at one? Create multiple lamps in different sizes to add variety and beauty to your fireplace. Get ready to impress your friends and family with this incredible DIY project.
1. Introduction
Are you tired of having a fireplace that goes unused for half the year?
Do you wish you could add a cozy and elegant touch to your fireplace even in the warmer months?
Well, we have the perfect solution for you – DIY hurricane lamps! In this article, we will guide you through the process of creating your own hurricane lamps using simple materials.
These lamps will not only fill your fireplace with beautiful light and sparkle, but also create the illusion of a real fire. Get ready to transform your fireplace into a stunning focal point all year round!
2. Problem: Limited use of fireplace
Having a fireplace can be a wonderful feature in any home. However, the reality is that most people only use their fireplaces during the colder months of the year.
This leaves a dark and empty space for the rest of the year, taking away from the overall appeal of the room. It’s a shame to let such a beautiful architectural element go to waste. That’s why we’re here to provide a creative solution to this problem – DIY hurricane lamps!

This image is property of i.ytimg.com.
3. Solution: DIY Hurricane Lamps
Instead of leaving your fireplace empty and unused, why not fill it with DIY hurricane lamps? These lamps are easy to make and will instantly transform your fireplace into a captivating display of light and ambiance.
By using decorative grills and electric candles, you can achieve the look and feel of a real fire without any safety concerns. Plus, the flickering candlelight reflecting off the metal grills will create a cozy and inviting atmosphere in your space. Let’s dive into the materials and steps needed to create your very own DIY hurricane lamps.
4. Materials needed
Before you get started, let’s gather all the materials you’ll need for this project:
- Decorative grills (available at any local hardware store)
- Electric candles (to ensure safety)
- Tin snips for cutting the grills
- Copper wire for attaching the grills together
That’s it! With just a few basic materials, you’ll be able to create stunning hurricane lamps for your fireplace.

5. Step 1: Choosing the size of the lamp
The first step is to determine the size of the hurricane lamp you want to create. Take a candle and visualize how much of it you want to be covered by the grill. Aim for a little bit of a lip, creating a focal point at the top. Once you have decided on the size, you can proceed to the next step.
6. Step 2: Cutting the decorative grills
Using tin snips, follow the marked line as your guide and cut off the extra parts of the decorative grills. This will ensure that the grills fit perfectly around the candle and create a snug fit.
7. Step 3: Rolling the candle over the grill
Take the candle and roll it over the grill, making sure to overlap it slightly. This will help you determine where to mark the grill for cutting. Once you have marked the spot, use the tin snips to cut the grill along the marked line.
8. Step 4: Attaching the grills together
To connect the two pieces of grill, you will need copper wire. Copper wire is both strong and pliable, making it perfect for this task. Line up the pattern of the grills and put the wire through them. Then, twist the wire together to hold the grills in place. This will create a secure and seamless connection between the grills.
9. Step 5: Finishing touches
With the grills securely attached, your hurricane lamp is almost complete. Take a moment to admire your creation! You can now place the electric candle inside the grill, ensuring that it sits snugly. Feel free to add any finishing touches, such as decorative elements or additional wire to enhance the overall aesthetic. Now, you’re ready to bring your DIY hurricane lamps to life!
Congratulations! You have successfully created your very own DIY hurricane lamps for your fireplace. With just a few materials and simple steps, you have transformed your fireplace into a stunning focal point that can be enjoyed all year round.
The flickering candlelight and the sparkle of the metal grills will create a cozy and inviting atmosphere in your space. So sit back, grab a cup of hot cocoa, and bask in the warmth and elegance of your transformed fireplace. For more DIY ideas and inspiration, be sure to visit HomeMadeSimple.com. Happy crafting!

